 Colouring Nest
How to Draw a Present: 6 Easy Steps
A present is made of rectangles: a box, a lid, and a ribbon that goes down and across. The bow on top is the fun part. It is a good drawing for learning to keep lines straight and to draw one shape on top of another.
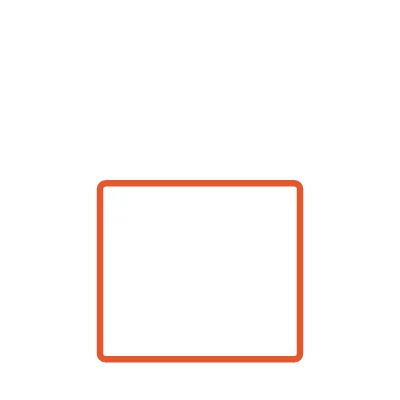
Step 1 Draw a big box for the present. 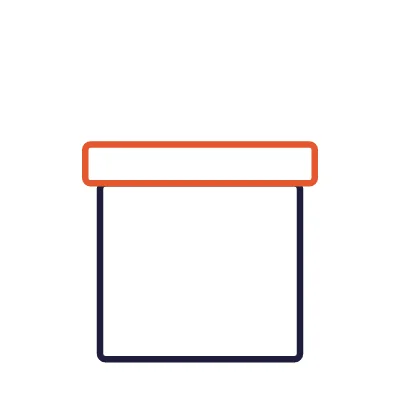
Step 2 Draw the lid: a flat rectangle on top that sticks out a little at each side. 
Step 3 Draw a ribbon straight down the middle, over the lid and the box. 
Step 4 Draw the ribbon going across the box on both sides. 
Step 5 Draw a bow on top: two loops and a round knot in the middle. 
Step 6 Add spots to the paper so it looks like gift wrap.
The new part of each step is drawn in orange; everything you have already drawn is in black.
Advertisement
Tips for drawing a present
- Draw the ribbon first lightly, then make it darker once it is in the middle.
- If the box and lid lines show inside the ribbon, rub them out or colour over them.
- Draw a few presents of different sizes in a pile, or put them under your Christmas tree drawing.
Print the step sheet

Two pages: all 6 steps with their pictures, then a big practice box with the finished present in the corner to copy.
Step sheet (A4 PDF) Step sheet (US Letter PDF)
Finished? Colour it in, or try present template to cut out and christmas colouring pages.
More easy drawings
 Christmas Tree
 Star
 Snowman
 Gingerbread Man
 Candy Cane
 Christmas Bauble
 Reindeer Face
 Penguin
 Polar Bear Face
 Santa Hat
 Snowflake
All how-to-draw pages · How to draw with kids: a guide for grown-ups
Advertisement