 Colouring Nest
Merry Christmas Bunting
- Ages 3+
- Easy
- 33 pages
- Template
- Free PDF: Letter & A4
Free PDF. No account needed.


No ratings yet
Tip: tap a colour, then a shape to fill it (arrow keys and Enter work too). It saves on this device.
Up nextHappy New Year Bunting →Advertisement
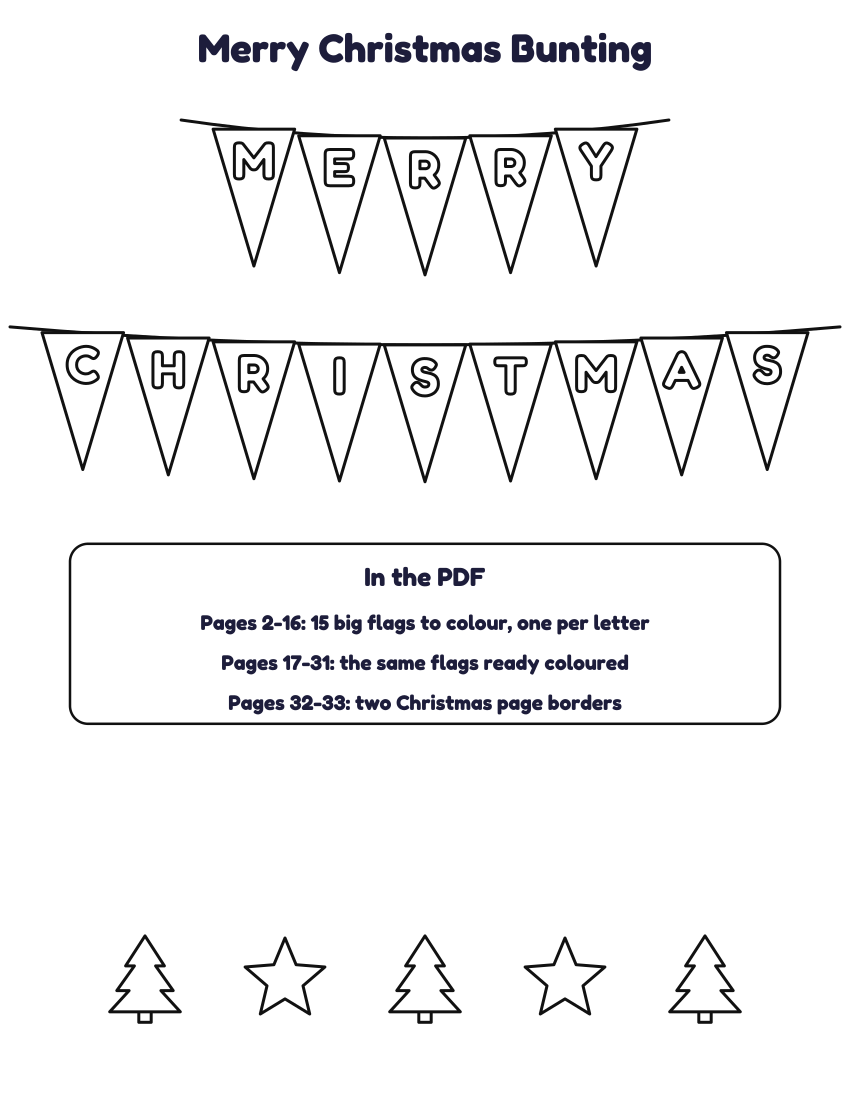
Merry Christmas bunting for a classroom display, a front window or a party: 14 flags, one big bubble letter on each, with a Christmas picture flag between the words. Every flag fills a page (6.25 x 8.25 in on US Letter (16.5 x 22 cm on A4)), with punch holes and a fold-over strip for the string. Colour the letters online or on paper, or print the ready-coloured set; two matching Christmas page borders for writing and display work are at the end of the PDF. Made for December.
What is in the PDF
The flags in order: M E R R Y ★ C H R I S T M A S (★ is a picture flag between words). Each flag is 6.25 x 8.25 in on US Letter (16.5 x 22 cm on A4). Print only the pages you need: the page numbers are on the picture above.
Pair it with the paper chain strips and the 3D star for a whole Christmas display. The page borders work for writing, poems, drawings and display titles.
Also for christmas: Christmas Paper Chain Template · 3D Paper Star Template · All classroom display bunting, borders and crafts
How to make the merry christmas bunting
You need a printer, scissors, colouring pens or crayons, string or ribbon and a hole punch or tape.
- Print. Print the flags at 100% (Actual size) on paper or thin card; the check bar on each page should measure 1 inch on Letter or 2 cm on A4.
- Colour. Colour the letters and pictures, or print the ready-coloured pages. One child per flag works well for a class.
- Cut. Cut along the solid outline of each flag.
- Hang. Punch the two holes and thread string or ribbon through, or fold the top strip over the string on the dashed line and tape it down.
- Space. Leave a small gap between flags and a picture flag between words, then pin the ends of the string to the wall or a display board.
Advertisement
More printable templates


Seasonal: Christmas Coloring Pages
You might also like


Printing tips
- Print at 100% (actual size) so the shapes match the sizes listed.
- Thin card (160–200 gsm) makes sturdy stencils and decorations.
- Fold the paper and cut two layers at once for matching pairs.
- Paper snowflakes are the exception: use thin printer or origami paper, because every cut goes through 12 layers.
Advertisement